> ## Documentation Index
> Fetch the complete documentation index at: https://docs.versori.com/llms.txt
> Use this file to discover all available pages before exploring further.
# Embedded connectors
An embedded connector allows external users — people outside your organisation — to authenticate with their own
credentials when using your integration. Instead of storing a single set of credentials, the connector defines the
required authentication method and delegates credential management to each individual user.
This is the foundation for building **multi-tenant integrations** where many customers connect to the same integration
independently, each with their own accounts and permissions in the target system.
## How embedded connectors work
A standard connector stores credentials that you provide directly. When the integration runs, it authenticates using
those fixed credentials on your behalf.
An embedded connector works differently. You configure the authentication method (for example, OAuth2 or API Key) but no
credentials are provided. Each external user then supplies their own credentials when they activate the integration,
either through the **Users** tab in the platform or via your own application using the Versori APIs.
 | | Standard connector | Embedded connector |
| -------------------- | ------------------------------ | ------------------------------------------------- |
| **Credentials** | Stored directly by you | Provided by each external user at activation time |
| **Tenant model** | Single-tenant | Multi-tenant |
| **User activation** | Immediate — ready once created | Users activate via the Users tab or Versori APIs |
| **Typical audience** | Internal teams | External customers, partners, or end users |
## When to use an embedded connector
Embedded connectors are the right choice whenever your integration needs to operate on behalf of multiple independent
users or organisations. Common scenarios include:
### Customer-facing integrations
You are building a product that offers integrations to your customers. Each customer connects their own account — for
example, their own Salesforce instance or Slack workspace — rather than sharing a single set of credentials controlled
by you.
### Marketplace or partner integrations
You publish integrations that partners or third-party users can adopt. Each partner activates the integration with their
own credentials, keeping their data isolated from other users.
### Multi-tenant SaaS platforms
Your platform serves multiple tenants, each of which needs to push or pull data from external systems using their own
API keys or OAuth tokens. Embedded connectors ensure that each tenant's credentials are scoped to their own activation.
If your integration only needs to run with a single set of credentials that you control, a standard connection is
simpler. Switch to an embedded connector when external users need to authenticate independently.
## Setting up an embedded connector
You enable embedded mode when creating a connection for a connector. The process follows the same steps as creating a
standard connection, with one key difference: you toggle **Embedded Connection** on, which removes the credential
fields.
Navigate to the **Connect** tab, select the connector, and click **+ New Connection**.
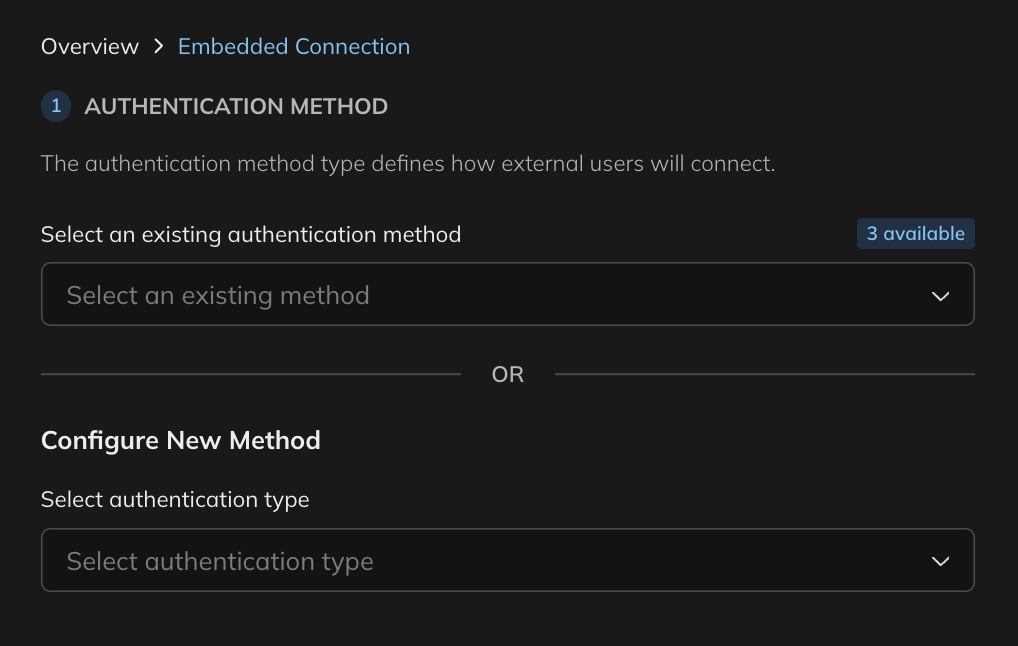
Choose the authentication type that the target API requires (for example, API Key or OAuth2). Fill in the auth method
fields — such as the header name and insertion point for an API Key — and click **Create**.
| | Standard connector | Embedded connector |
| -------------------- | ------------------------------ | ------------------------------------------------- |
| **Credentials** | Stored directly by you | Provided by each external user at activation time |
| **Tenant model** | Single-tenant | Multi-tenant |
| **User activation** | Immediate — ready once created | Users activate via the Users tab or Versori APIs |
| **Typical audience** | Internal teams | External customers, partners, or end users |
## When to use an embedded connector
Embedded connectors are the right choice whenever your integration needs to operate on behalf of multiple independent
users or organisations. Common scenarios include:
### Customer-facing integrations
You are building a product that offers integrations to your customers. Each customer connects their own account — for
example, their own Salesforce instance or Slack workspace — rather than sharing a single set of credentials controlled
by you.
### Marketplace or partner integrations
You publish integrations that partners or third-party users can adopt. Each partner activates the integration with their
own credentials, keeping their data isolated from other users.
### Multi-tenant SaaS platforms
Your platform serves multiple tenants, each of which needs to push or pull data from external systems using their own
API keys or OAuth tokens. Embedded connectors ensure that each tenant's credentials are scoped to their own activation.
If your integration only needs to run with a single set of credentials that you control, a standard connection is
simpler. Switch to an embedded connector when external users need to authenticate independently.
## Setting up an embedded connector
You enable embedded mode when creating a connection for a connector. The process follows the same steps as creating a
standard connection, with one key difference: you toggle **Embedded Connection** on, which removes the credential
fields.
Navigate to the **Connect** tab, select the connector, and click **+ New Connection**.
Choose the authentication type that the target API requires (for example, API Key or OAuth2). Fill in the auth method
fields — such as the header name and insertion point for an API Key — and click **Create**.
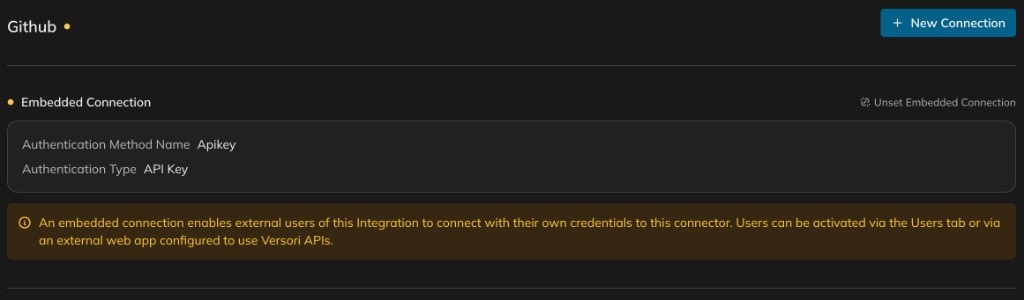
 In the **Connection** section, toggle **Embedded Connection** on. The credential input fields disappear because each
user will supply their own credentials at activation time.
Click **Connect** to create the embedded connection. The connector is now ready to accept external users.
In the **Connection** section, toggle **Embedded Connection** on. The credential input fields disappear because each
user will supply their own credentials at activation time.
Click **Connect** to create the embedded connection. The connector is now ready to accept external users.
 An embedded connection does not function until at least one external user has been activated. Activate users through
the **Users** tab or programmatically via the Versori APIs.
## Next steps
Learn how to design integrations that serve multiple tenants with isolated credentials and data.
See the full guide on creating connections, including standard and bypassed authentication.
An embedded connection does not function until at least one external user has been activated. Activate users through
the **Users** tab or programmatically via the Versori APIs.
## Next steps
Learn how to design integrations that serve multiple tenants with isolated credentials and data.
See the full guide on creating connections, including standard and bypassed authentication.